
iPhone data loss prevention checklist: back up before you repair

Back up your iPhone now, remove your bank cards and Apple Pay, sign out of anything sensitive, check Find My at Icloud, change your Apple ID password, and either set a temporary passcode or erase the device before you hand it over. That’s the full six-step version. Do these in order and you’ve closed off almost every way a repair, a drop, or a dead battery turns into a data disaster.
Everything below explains how to do each step properly, and how to check it’s actually worked. Named entities you’ll rely on throughout: iCloud, Apple ID, Finder or iTunes, and password managers like 1Password or Bitwarden. The single safest thing you can do, above all else, is confirm you have a restorable backup before you touch anything else.
Back up your data to iCloud or a local encrypted backup
Remove cards from Apple Pay and Wallet
Sign out of sensitive apps, banking, email if not already locked
Check iCloud.com for Find My status and synced data
Change your Apple ID and email passwords
Set a temporary passcode, or erase fully if the device is leaving your hands for good
Pro Tip: If you only do one thing before a repair or a resale, verify your backup actually restores. A backup you’ve never tested is a guess, not a safety net.
Key Takeaways
A verified backup, whether through iCloud or an encrypted local copy, is the single step that determines whether a repair, a drop, or a dead phone ends in inconvenience or genuine loss.
Point | Details |
Verify your backup | Confirm the backup date in Settings → Apple ID → iCloud and check contents at iCloud.com. |
Keep both backup types | An encrypted local backup via Finder or iTunes is the only one storing Keychain and Health data. |
Remove cards and sign out | Take Apple Pay cards out of Wallet and sign out of banking apps before any repair. |
Choose erase over limited access | Erase whenever the repair allows it; use a temporary passcode only when unlocking is unavoidable. |
Rotate passwords afterwards | Use a manager like 1Password or Bitwarden and change your Apple ID password once the phone is back. |
Book with a privacy-conscious repairer | Rapid Repairs London limits device access to what each specific repair actually requires. |
Table of Contents
Ten-minute emergency workflow when the phone still works
If your iPhone is cracked, glitching, or about to go in for repair but still switches on, you have a short window to protect everything on it. Plug it into power and connect to Wi-Fi immediately. A backup that stalls halfway through because the battery died is worse than no backup, because you won’t notice until you need it.
Work through this in order:
Start an iCloud backup (Settings → your name → iCloud → iCloud Backup → Back Up Now), or connect to a computer for a local encrypted backup.
Remove your cards from Apple Pay and delete anything sensitive from Wallet.
Disable AirDrop or set it to “Contacts Only”, since it’s an easy route for someone to pull files off your device.
Sign out of banking apps, email, and anything with saved payment details.
Photograph the IMEI and serial number (Settings → General → About), useful if you need to raise a claim later.
Do not skip the AirDrop step even if you’re only handing the phone to someone you trust
Do not assume a locked screen is enough protection on its own
Pro Tip: If you’re leaving the phone with a technician for diagnostics that need it unlocked, set a temporary passcode you can change straight after, and try to stay in the shop while they run the test. Most legitimate diagnostics take minutes, not hours.
How do I make a full backup and check it worked?
Both iCloud and an encrypted local backup are valid, but they’re not interchangeable. iCloud is quick and works over Wi-Fi; a local encrypted backup made through Finder or iTunes is the only version that stores your saved passwords, Health data, and Keychain, because Apple requires encryption for those categories.
Making an iCloud backup:
Go to Settings → your name → iCloud → iCloud Backup.
Tap Back Up Now and stay connected to Wi-Fi and power until it finishes.
Confirm the backup date under “Last successful backup” matches today.
For a second confirmation, sign in at iCloud.com and check Photos, Contacts, or Notes are showing current items.
Making a local encrypted backup:
Connect your iPhone to a Mac (via Finder) or a Windows PC (via iTunes).
Select your device, then tick “Encrypt local backup” and set a password you’ll remember.
Click “Back Up Now” and wait for it to complete without disconnecting.
Verify by checking the backup size in Finder or iTunes preferences. A near-empty backup usually means it failed silently.
Neither method is complete on its own if your storage is close to full or your Mac or PC has run out of disk space, so check for common backup failures if a backup looks smaller than expected.
iCloud: convenient, automatic, capped by your storage plan, doesn’t include Keychain unless iCloud Keychain sync is on
Local encrypted backup: unlimited by your device storage, includes Health and Keychain data, requires a computer
Pro Tip: When the data on the phone is genuinely irreplaceable (family photos, a business’s client records), keep both. An iCloud backup and an encrypted local backup cost you ten extra minutes and give you two independent recovery paths.
Should you erase the phone or limit access before repair?
Erase the device whenever you can. Limited access is the fallback, not the default, and it’s only appropriate when a technician needs the phone unlocked for a diagnostic test that a factory-reset device can’t run.
Erase when:
You’re trading the phone in or selling it
The repair involves the battery, charging port, or water damage where the shop needs to power-cycle the device repeatedly
You suspect the device has already been compromised
Use limited access only when:
The fault is something like a cracked screen or unresponsive button that needs to be tested while unlocked
You genuinely need the phone back within hours and a full restore isn’t practical
If you’re going the limited-access route: set a temporary passcode, remove Apple Pay cards, turn off Face ID temporarily, disable AirDrop, sign out of banking and email apps, and check which apps have access to Photos and Files under Settings → Privacy & Security.
Before you leave the phone, ask the technician a few direct questions. Why do they need the passcode specifically, rather than testing with it locked? What exactly will they check? Where will the device be stored while it’s with them, and do they have a written privacy policy you can see? A reasonable repair shop should be able to answer these without hesitation. Our own guide on preparing a device for a repair shop covers the same ground in more depth, and it’s worth reading alongside our explainer on what a full restore actually does if erasing is on the table.
What if the iPhone won’t turn on or you can’t unlock it?
Check iCloud.com before you attempt anything else. When Find My is enabled, you can often see whether Photos, Contacts, and recent backups synced before the phone stopped responding, which tells you how much you’d actually lose.
From there:
Try a forced restart only if it’s a known fix for the specific symptom (a black screen from a crash behaves differently to a phone stuck on the Apple logo)
Connect to a computer via Finder or iTunes to check whether recovery mode sees the device at all
Avoid unofficial firmware tools or “unbrick” utilities you’ve found through a forum post. These frequently overwrite the very data you’re trying to save
If the device won’t respond to Finder or iTunes and there’s no recent backup, that’s the point to stop trying fixes yourself. Data recovery on a device with physical damage, particularly water damage or a failed logic board, is not something you improve your odds at by experimenting. Specialist recovery services exist precisely because retrieving data from a dead board is a different skill set to screen or battery replacement, and success isn’t guaranteed even then. If your phone is stuck on the Apple logo or caught in a restart loop, those are usually recoverable faults rather than data emergencies, but treat them as urgent all the same.
Are hidden photos actually private?
No. Hiding a photo moves it to a Hidden album, but anyone holding an unlocked phone can find that album in seconds. Treat hiding as a convenience feature, not a security one, and treat the device as though a stranger will have full access to it the moment it’s unlocked.
For anything genuinely sensitive:
Delete the file from Photos rather than just hiding it.
Go into the Recently Deleted album and delete it permanently there too, since Apple keeps it recoverable for 30 days otherwise.
Check Messages, Files, and any shared albums for duplicate copies, and remove those separately.
For files you need to keep but never want exposed, move them into a dedicated vault app first, then delete the originals everywhere else, including Recently Deleted.
Pro Tip: Deleting on the device doesn’t always finish the job. If you’re synced to iCloud or Google Photos, check both after deleting locally. Google Photos in particular can keep its own copy even after the phone version is gone, so open the app and confirm the item’s actually removed from that library too.
Password and account hardening before and after repair
A password manager does more here than convenience. Tools like 1Password and Bitwarden let you rotate dozens of passwords quickly, which matters if you’re not sure exactly what a technician could have seen.
Set up a password manager if you don’t already use one, and create one strong master password you don’t reuse anywhere else.
Change your Apple ID password first, since it controls iCloud, Find My, and often your email recovery.
Rotate passwords for your primary email and banking apps next.
Turn on two-factor authentication for Apple ID and email if it isn’t already active.
Go to appleid.apple.com, sign in, and remove any device from your account you don’t recognise.
If you’re erasing the phone entirely, sign out of iCloud on the device first where you can, since signing out disables sync but doesn’t touch local files already saved to the device, which is exactly why the manual deletion steps above still matter even after sign-out.
Revoke sessions you don’t recognise from appleid.apple.com
Check for logged-in browser sessions on shared or old devices too
How do you erase and restore an iPhone safely?
Erase only once your backup is verified. Erasing signs you out of Apple ID automatically, and if you remove the device from your account properly beforehand, it avoids Activation Lock issues for whoever receives it next.
Confirm your backup completed and check the date stamp again.
Remove Apple Pay cards from Wallet.
Sign out of Apple ID (Settings → your name → Sign Out), or remove the device remotely from iCloud.com if you can’t access the phone directly.
Go to Settings → General → Transfer or Reset → Erase All Content and Settings.
Confirm you no longer see the device listed under your Apple ID account online.
To restore later, choose between an iCloud restore during setup or a Finder/iTunes restore from your encrypted local backup. Once restored, check that messages, photos, and Health data all reappear as a verification pass, and if anything’s missing, it’s usually because the wrong backup date was selected during setup.
Verify Photos app shows your full library, not just recent items
Open Health app and confirm historical data is present
Check Messages for older conversations, not just the most recent thread
When should you use a professional repair shop versus a data recovery specialist?
Use a repair shop for hardware faults, screens, batteries, charging ports, and use a dedicated data recovery specialist when the data itself is inaccessible and there’s physical or logic-board damage involved. These are genuinely different skills, and a shop that’s excellent at screen replacement isn’t automatically equipped for chip-level recovery.
Expect a diagnostic fee at most reputable shops, refunded against the repair cost if you proceed
Ask whether any repair method risks overwriting data before it’s attempted
Ask how device access is logged and whether there’s a written privacy policy
Ask if you can remain present for initial diagnostics
Choosing a shop with clear privacy practices matters as much as choosing one with good technical reviews. Rapid Repairs London’s iPhone repair service is built around exactly this kind of transparency, and it’s worth reading what genuinely warrants a professional repair before you decide between a shop visit and trying a fix yourself.
What a repair technician actually needs from your phone
Most tests never need your passcode at all. Screen replacement, battery swaps, and charging port repairs can usually be verified with the device locked, since a technician is checking hardware response, not app content. The tests that genuinely need an unlocked device are limited: Face ID calibration, certain camera diagnostics, and confirming a repair hasn’t affected Touch ID or biometric sensors.
When a customer hands over a locked phone with a temporary passcode and stays nearby while diagnostics run, that’s the version of this process working exactly as it should. It’s not distrust, it’s just sensible, and any technician who bristles at the request is telling you something.
The shortcuts worth remembering: back up before you arrive, ask specifically what needs unlocking and why, and never leave a device somewhere without asking about their storage and access policy first.
A local repair option that treats your data properly
Rapid Repairs London handles iPhone screen, battery, charging port, and water damage repairs from a north London shop, and access to your device is limited strictly to what a given repair actually requires. Where a diagnostic genuinely needs the phone unlocked, you’re welcome to stay while it’s tested, and a temporary passcode is treated as standard practice rather than an inconvenience.

If your iPhone needs attention and you’ve worked through the backup steps above, book a diagnostic through the iPhone repair page and bring the device in with your data already secured. That’s the order that protects you best: back up first, then repair.
Frequently asked questions about preventing iPhone data loss
Does erasing my iPhone delete my iCloud backup too? No. Erasing the device removes everything stored locally, but your iCloud backup stays intact on Apple’s servers until you choose to delete it or it’s replaced by a newer one.
Can a repair shop see my photos if my phone is locked? Not without your passcode. A locked iPhone with Face ID or Touch ID disabled stays inaccessible unless a technician has your passcode or you unlock it for them, which is why a temporary passcode is worth setting.
Is iCloud backup enough on its own before a repair? It covers photos, messages, and most app data, but it won’t include your saved passwords or Health data unless you also make an encrypted local backup through Finder or iTunes.
What happens if I forget to sign out of Apple ID before repair? The technician may not be able to test certain features that require an active Apple ID session, and if the device needs to be erased during repair, an unremoved Apple ID can trigger Activation Lock problems afterwards.
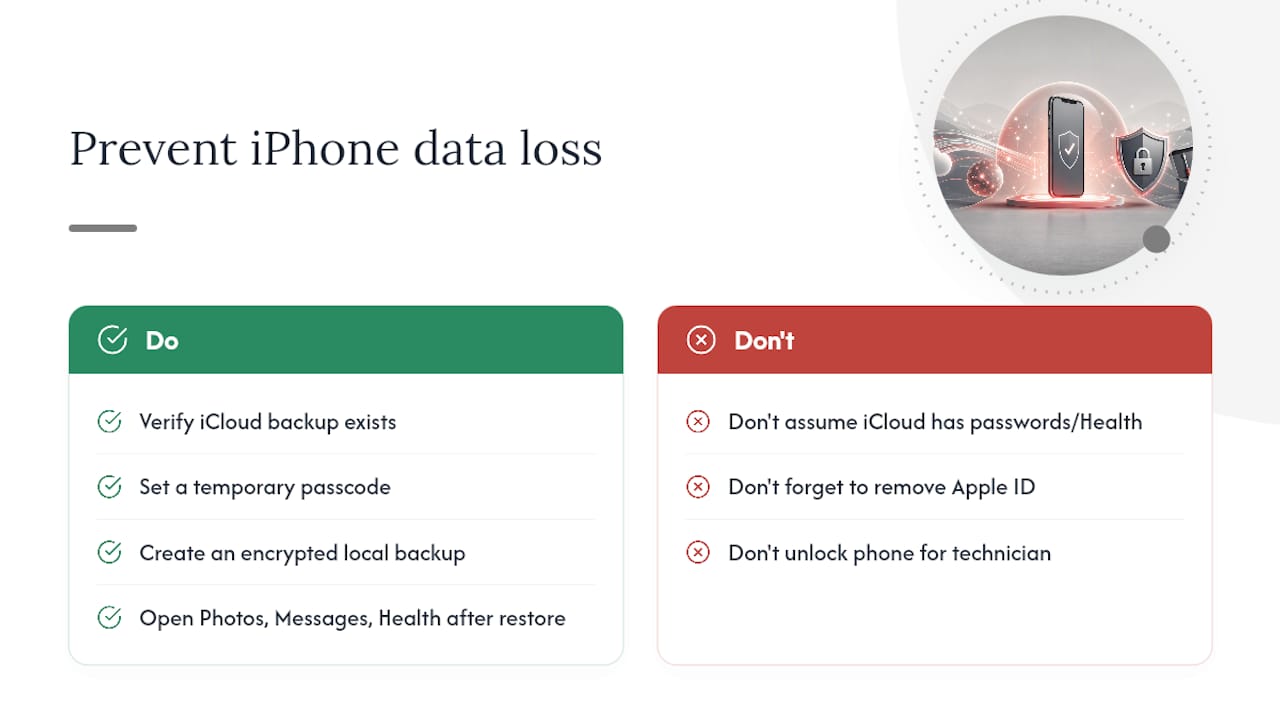
How do I know if my backup actually includes everything? Check the backup size in Finder or iTunes preferences, and after any restore, manually open Photos, Messages, and Health to confirm your data reappeared rather than assuming it did.
Sources
The ICO’s material is written primarily for organisations handling other people’s data, but the underlying principle, that signing out isn’t the same as deleting, applies just as directly to your own iPhone before it leaves your hands.
Recommended
Comments